
Connect Eidograph in ChatGPT
The ChatGPT desktop app can read and edit Eidograph figures directly through MCP. This guide uses Eidograph and the ChatGPT desktop app running on the same Windows computer, connected with Streamable HTTP.
The screenshots show the actual setup in an English interface. MCP tools must run in an environment that can reach Eidograph's local server: 127.0.0.1 in a remote or cloud environment does not refer to your Windows computer.
1. Start the Eidograph server
- Open the installed Eidograph app, go to Settings › MCP / REST server, enable the server, and confirm that it is running.
- Copy the full MCP address shown in settings. The default is
http://127.0.0.1:14159/mcp; if you changed the port, use the address actually displayed. - Enable the required tools. In Figures, make sure the target figure's exposure dot is filled, allowing external clients to access it.
- Keep Eidograph running while connected. The default local binding is sufficient for a connection on the same computer.
2. Add the MCP server in ChatGPT
Open Settings → Plugins → MCPs, click Add at the upper right, and select Add MCP server.
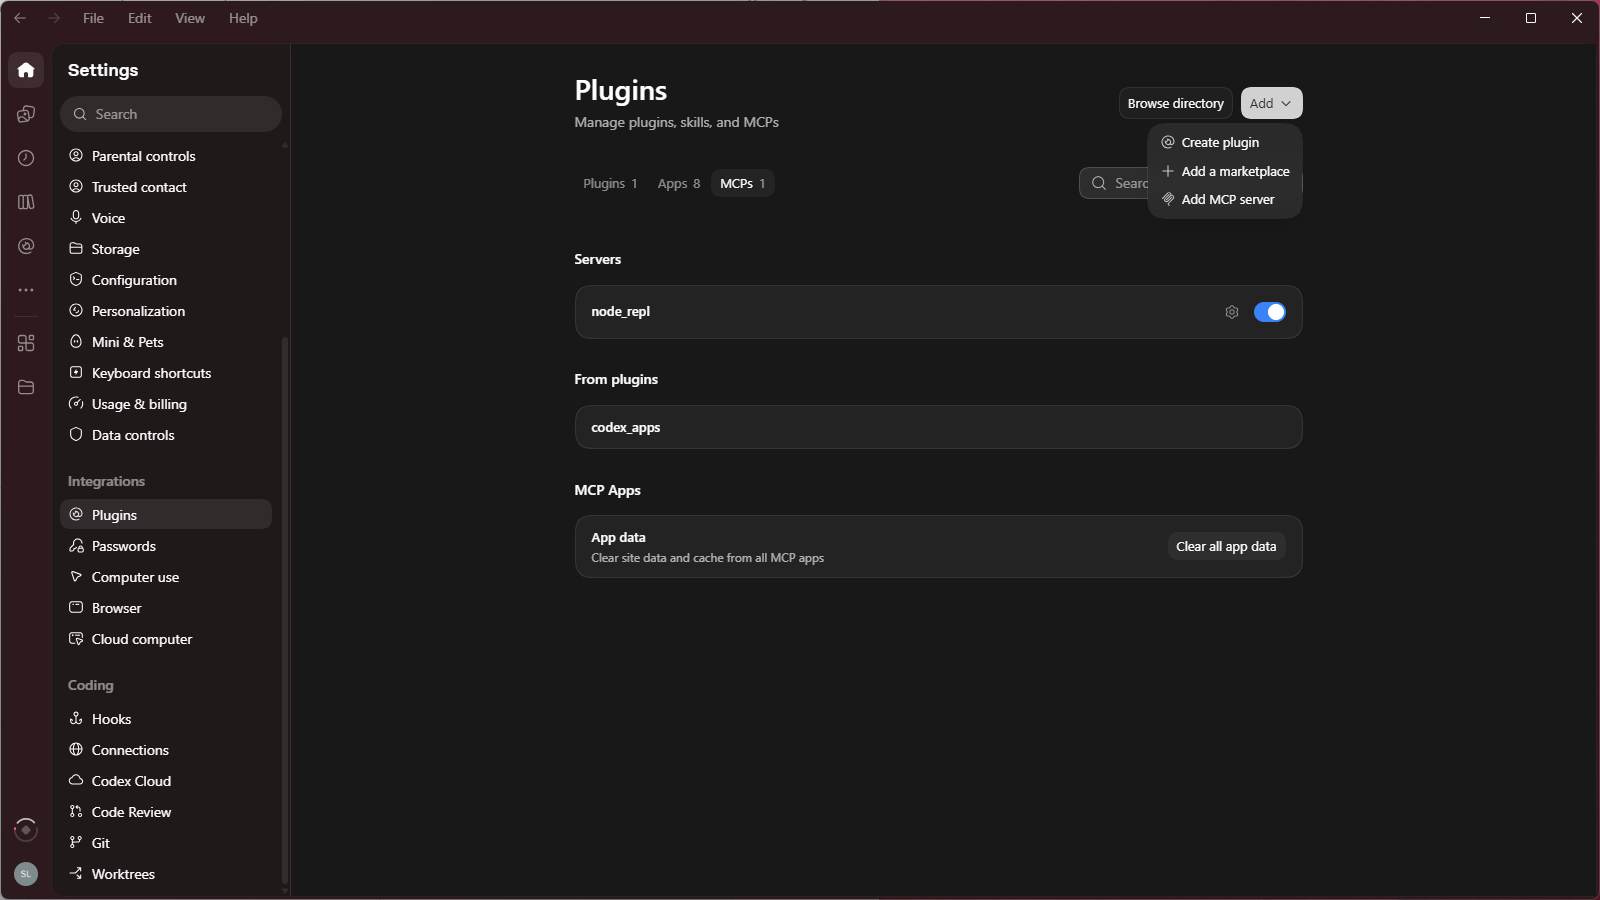
Fill in the Connect to a custom MCP form:
| Field | Value |
|---|---|
| Name | eidograph |
| Type | Streamable HTTP |
| URL | The full MCP address from Eidograph settings, for example http://127.0.0.1:14159/mcp |
Keep the final /mcp in the URL. /api/v1 is the REST API address, not the MCP endpoint needed here.
If Require an access token is enabled in Eidograph, add a Headers entry with key Authorization and value Bearer <token>, replacing <token> with the actual token. This header is unnecessary when token authentication is off.
Bearer token env var expects an environment variable name, not the token itself. Use it only when the corresponding variable is configured in ChatGPT's execution environment; leave it empty when configuring the header directly.
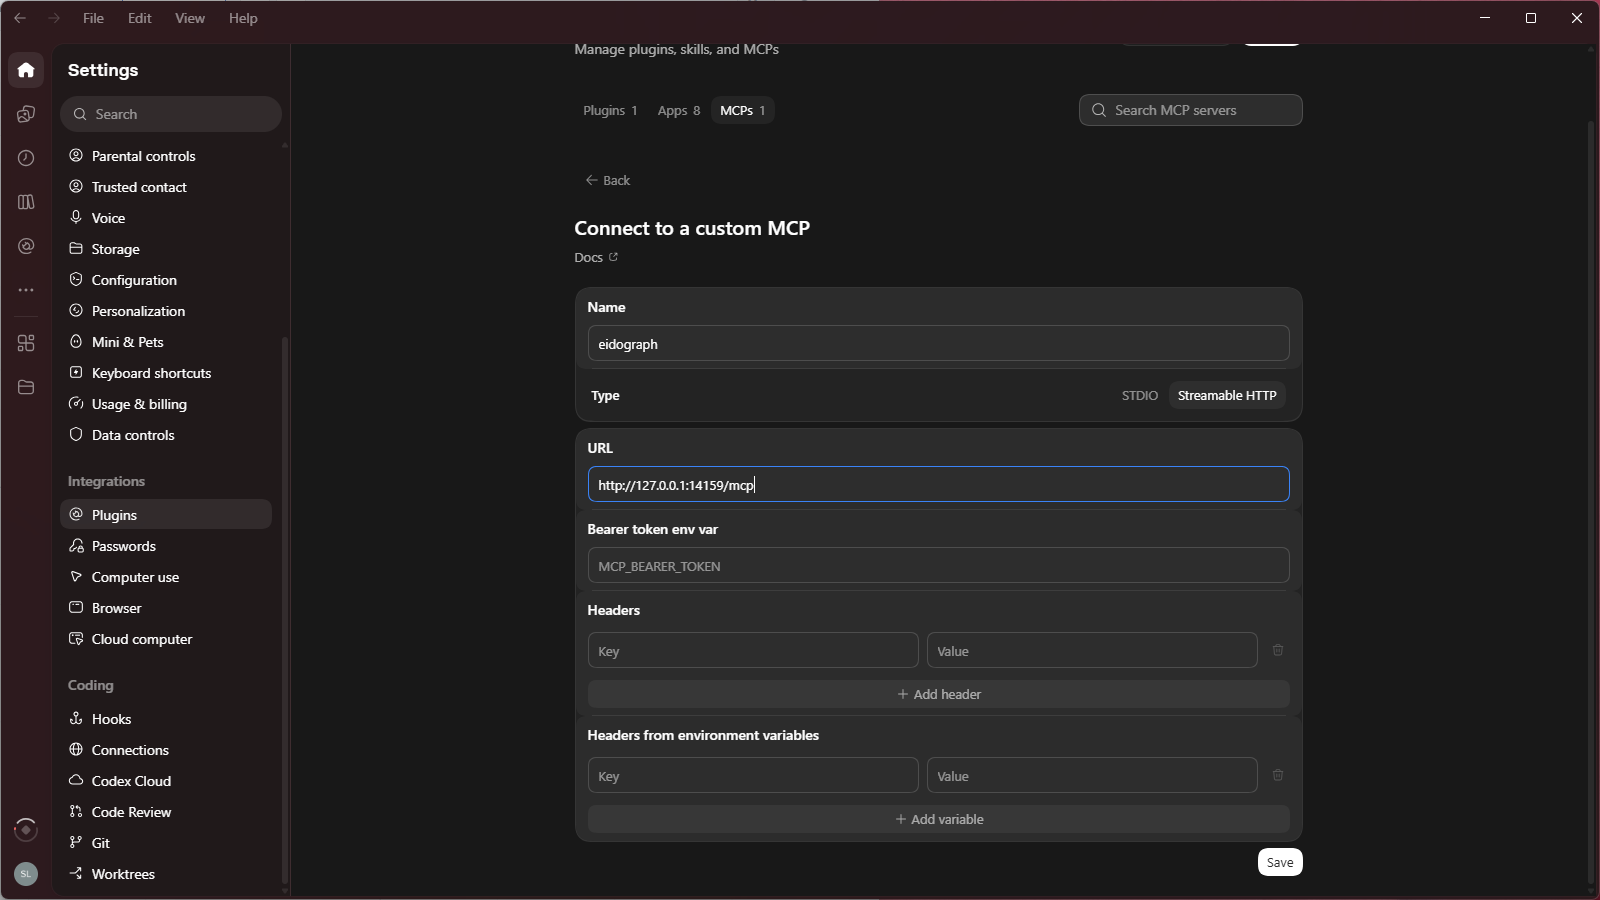
3. Save and enable the connection
Click Save. Back in MCPs, confirm that eidograph appears with its switch enabled. If the client asks you to reload or restart, follow that prompt, then open a new Work chat to use the tools.
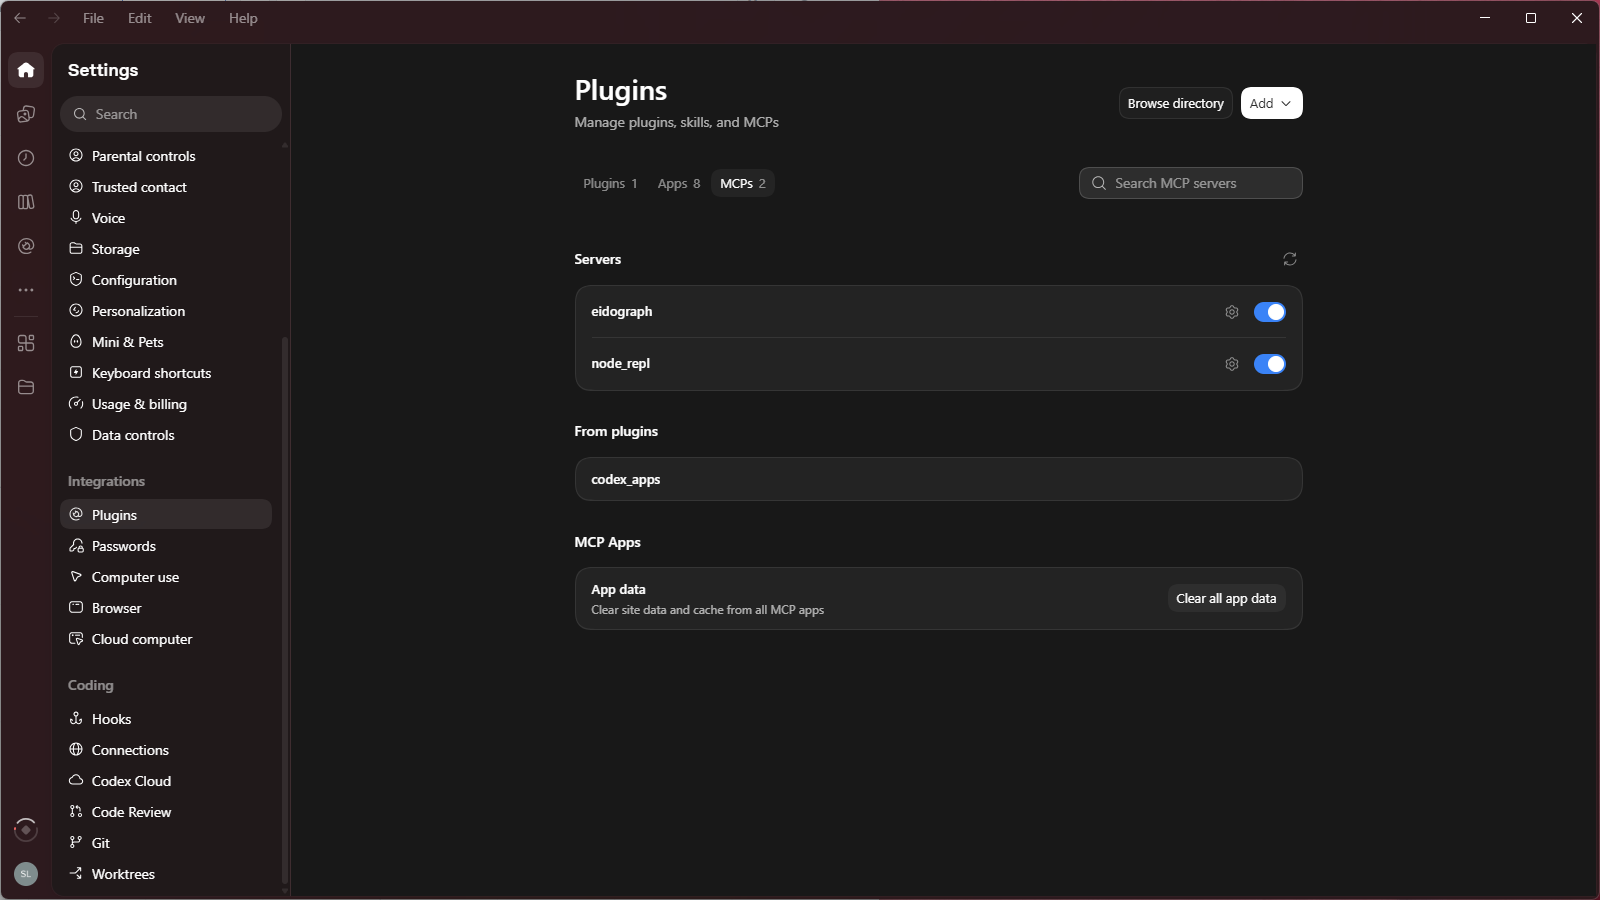
4. Read first, then draw
Start with a read-only request to confirm that the client sees the intended figure:
Use only the eidograph connector.
Call list_figures to list accessible figures, then get_script to read the current script.
Briefly describe the current figure. Do not modify or export anything.
After checking the returned figure name and script, ask it to draw:
Use the eidograph connector to create a separate 2D figure. Keep other figures unchanged.
Draw an isosceles triangle ABC, derive M as the midpoint of BC, and connect AM.
Use black lines and clear vertex labels, and make AM dashed.
Check list_commands for valid syntax first, then use list_diagnostics when finished.
This is a student paper: do not mark a right angle or include the proof.
Inspect the actual canvas, labels, and diagnostics afterward. You can also check tool calls in the recent external activity in Eidograph server settings. If ChatGPT's working environment supports document generation, ask it to obtain the figure image, generate a DOCX, and provide a file you can click to open in the chat; no save path is needed. Eidograph tools provide the image, while ChatGPT's working environment creates the document.
5. Troubleshoot the connection
- Cannot connect: check that Eidograph and its server are running, that the URL and port match, and that tools run in an environment able to reach this computer.
401response: check the token and theBearerprefix; do not put the actual token in the environment-variable-name field.- Connected but the target figure is missing: check the active project, figure exposure dot, and tool permissions.
- An edit did not take effect: confirm the active figure, inspect
list_diagnosticsand external activity, and correct the request based on the error.
See MCP, REST & the in-app Agent and the REST API reference for tool and permission details. ChatGPT menus and connection capabilities depend on the current client; consult the official OpenAI MCP documentation.